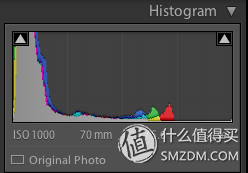
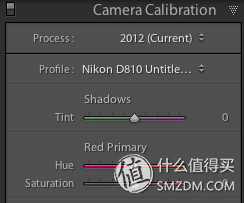
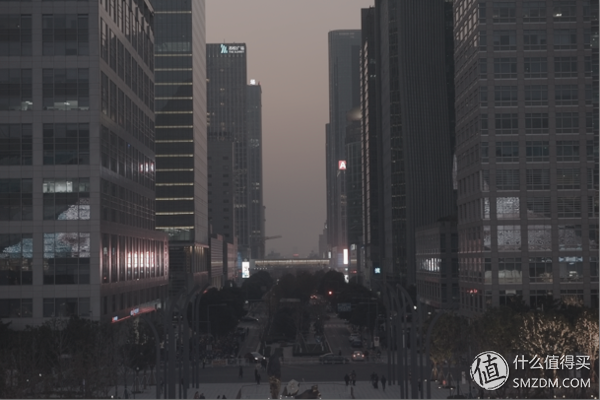
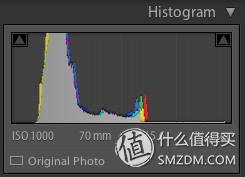
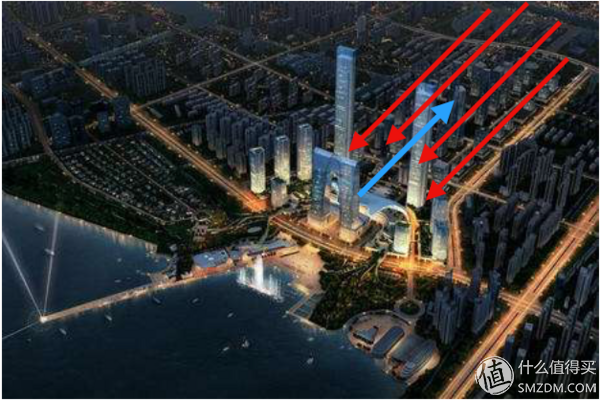
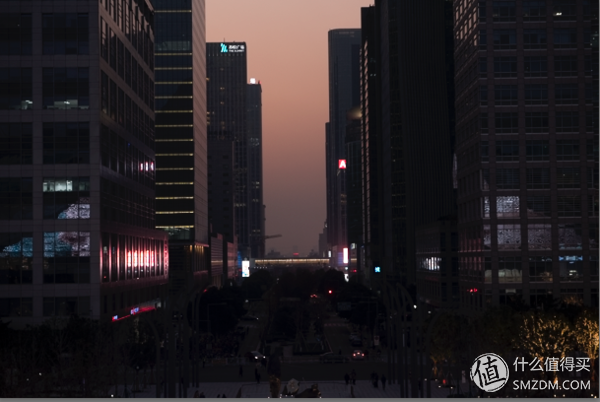
Xiao Biao Note: # Tan singles hit in the second quarter! Looking back at 2017, the good stuff bought at the end of the year is finally coming out—iPad, QC30, Kindle, JD Card, and more. You could win them all! # Value Friends Home # Inventory 40 friends’ classic decoration case, share your design stories and win EraClean million new fans. # The Original Innovator # Contribute and enjoy an extra 300 gold, light sun single-meitu article 6 gold coins, waiting for you! When it comes to shooting city night scenes, most online tutorials tend to be misleading for beginners. Those who teach the basics often skip the details, while those who go deeper rarely explain the fundamentals. For amateur photographers, watching these tutorials without context or sincerity can quickly kill their interest in photography. Today, I want to talk about a film I shot in the center of Suzhou last weekend. I couldn’t really talk about composition, so I just put together all the fragments of video I saw to give you a chance to explore the road ahead. It’s not great, but it's honest. Mostly because it was late. The location was a viewing platform on the west side of Star Yuet Hui complex in Suzhou. Across from it is the CBD of West Lake Park, with high-rise buildings and busy traffic. When starting a night shoot, the first thing to consider is the general direction of the street scene. If you want to capture the gap between a group of buildings, using a telephoto lens is usually the best choice. The advantage of a telephoto lens is that it compresses the sense of space, making distant objects appear closer than they are. This compression effect gives a unique perspective that the human eye doesn't always perceive. The longest focal length I had was 70mm on my 24-70mm f/2.8G lens. While this lens is great for portraits, it also works well for compressing space in urban scenes. The timing of a city streetscape shoot is crucial. To highlight the three-dimensionality of buildings, you shouldn’t shoot at midday when the sunlight is flat. Without shadows, the building surfaces lose their depth. Instead, the "Magic Hour"—the time 15 minutes before sunset—is ideal. During this period, the light is soft, and clouds or mist can add interesting textures to the sky. However, it’s tricky to catch this window of time. Sometimes, you might see the sun on the road, but by the time you get there, the conditions have changed. In fact, this film had three major mistakes in timing and location. First, I underestimated the difficulty of parking at Suzhou Center on weekends. I ended up waiting in line for almost an hour before rushing to the spot and setting up. Another mistake was forgetting the quick-release plate and shutter remote. Without them, even with an ND1000 filter, I had to rely on ISO and aperture to get the right exposure. High ISO introduced noise, and wide apertures lost detail. Fortunately, the D810 handled the imperfections quite well. The third problem was the seat position. A city building needs to be lit from the front to show its shape. But in this shot, the sun was behind the building (blue arrow), creating backlighting (red arrow). As a result, the building’s facade was dark, and I had to brighten it in post, which introduced noise and reduced image quality. There are two reasons why the “Magic Hour†is so special. At this time, the light angle and color are perfect. The sky is dark, and the blue tones are rich. The colors transition from warm golds and oranges at the horizon to cool blues above, creating a beautiful contrast. The building walls are typically cool and dark, while the office lights inside the glass facades add random warm tones. The overall color palette is rich and eye-catching. Many newcomers think night scenes are completely dark, but the final result can look like this: Let me show you what the original footage looked like. You’ll probably say, “This… this is how I’d do it too.†The original image had several issues: the buildings were too dark, the billboards were overexposed, there was stray light in the lower right corner, the buildings had some tilt, and the overall color lacked richness. This is why the RAW format is called digital film. It records the scene as accurately as possible, and post-processing is where the real magic happens. Unlike film, digital allows for more flexibility in editing. I chose to underexpose slightly to avoid blowing out the highlights on the billboards or reflections. The settings were F5.6 at 1/80s and ISO 1000. Without a tripod, I made sure to keep the shutter speed above 1/80s and the aperture at F5.6, increasing the ISO to compensate. These parameters aren’t set in stone—they depend on the situation. Looking at the histogram, the image is mostly underexposed, with few pixels on the right side. The color information is hidden in the brightness, so the image appears dull. To get more detail, I opened the camera’s configuration file and captured the log file. Using the log profile helped bring out more texture and richness in the image. Original image Log file Shooting in log mode helps preserve more dynamic range, allowing for better post-processing. The histogram shows that the pixels are now spread across the image, retrieving details from the darker areas. This is one of the key features of log footage—rich detail in the shadows. Next, I did lens correction to fix distortion and vignetting. Some lenses have unavoidable optical flaws, like purple fringing or barrel distortion. These can be corrected automatically or manually if needed. I also adjusted the composition to enhance the visual flow of the image. Secondary composition is a powerful tool that can help improve the final result, especially when the original scene wasn’t perfect. Then came the simple adjustments—color grading, contrast, and clarity. Manually adjusting the image gave it a more natural feel. Unfinished…… Fiber Optic Components,Parts Of Fiber Optic Cable,Fibre Optic Connector,Parts Of Optical Fiber Cixi Dani Plastic Products Co.,Ltd , https://www.danifiberoptic.com
Night Shooting Techniques

Post-Processing Techniques